As an Amazon Associate FreshCoffeeHouse.com earns from qualifying purchases.
You got yourself a Keurig, or you’re thinking about getting one, so you should know that proper maintenance will keep it running smoothly and brewing delicious coffee for years to come.
Have you noticed the descale option on top of your coffee maker? Curious what it is or what it does? I’m happy to tell you it’s nothing complicated and I’m glad to show you step-by-step instructions on how to clean and descale a Keurig.
Luckily, there isn’t much that goes into keeping your coffee maker brand new.

Every coffee machine uses hot water to brew your favorite cup of joe but as the months go by the small pipes inside the coffee maker get corroded by limescale. These small calcium carbonate deposits clog and potentially ruin your coffee maker.
Therefore, you need to descale the Keurig periodically by running a simple cleaning solution through the pipes.
How to Descale a Keurig?
- Fill the water tank with 10 ounces of white vinegar or Keurig Descaling Solution
- Start a brew cycle without a K-Cup ad let the solution run through the coffee maker.
- Repeat the process 2 or 3 times
- Finally, repeat the process with 10 ounces of clean water to rinse out the solution.
- All done.
As you see, descaling a Keurig is a fully automatic process so there’s no reason to stress about it. It’s important to run the cleaning solution through the machine at least once every six months.
If your Keurig is brand new I suggest using the official cleaning product but if you’ve already put some mileage on your coffee maker feel free to use white vinegar. It works just the same and costs a little less.
freshcoffeehouse.com is a participant in the Amazon Services LLC Associates Program. When you buy via the links on our site, we earn an affiliate commission at no cost to you.
How to Keep a Keurig Clean?
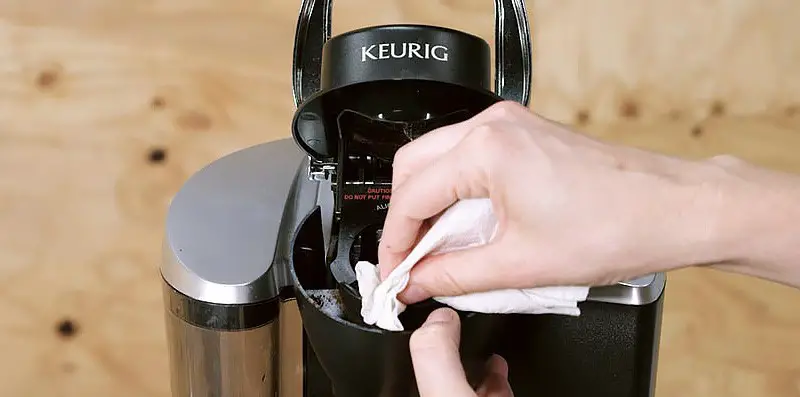
Maintaining this appliance is quite simple. I suggest the following steps on a weekly basis for keeping your Keurig looking and performing like brand new.
- Make sure to unplug the Keurig first.
- Remove the water tank, lid, drip catcher, and K-cup holder.
- Clean the removable parts with soap and water.
- Wipe down the Keurig with a soapy cloth.
- Reassemble the coffee maker.
- Ready to brew.

Good as New
It’s just a good idea to keep your appliances clean. Especially ones that come in direct contact with your food. By following these simple steps you are maintain the quality of your coffee and keeping the Keurig working like new for years to come.
I’ve always seen coffee as a way of bringing people together. Everywhere I go people seem to enjoy a fresh cup of coffee and that’s what drives my passion. There’s always a new brew to master, and there’s always a new face to enjoy it with. Hitch a ride with me on a coffee-fueled adventure to find a perfect cup.


